Pages

Sunday, November 30, 2008

Christmas Tilda Shadow Box Tutorial


Remember this card that I made a few months ago for the Guest Designer work for Diana Crick at Scor-Pal? My tutorial is now posted on the Scor-Pal website along with the other great projects from different designers. To view the Christmas Scor-Pal Magazine please click here, and here is the link to my tutorial.

After you check out my tutorial, please come back here to leave me a comment. It was my very first designer work and my very first tutorial. I would love to know what you think.

Oh, and if you want to see more close up and other photos of this card please see my post dated September 9th here.

:) Irina

Friday, November 28, 2008

What a better way to Give Thanks..

PLEASE SCROLL DOWN TO THE END OF THE POST FOR AN IMPORTANT UPDATE!!

then to show our appreciation. My friend Sylvia told me about this campaign to send handmade cards to the Walter Reed Army Medical Center in Washington, D.C. for recovering soldiers.

If you would like to participate, here are the details:

"When doing your holiday cards this year, take one card and send it to this address. If we pass this on and everyone sends one card, think of how many cards these wonderful special people who have sacrificed so much would get.

A Great Idea!!!

When you are making out your Christmas card list this year, please include the following:

A Recovering American Soldier
c/o Walter Reed Army Medical Center
6900 Georgia Avenue,NW
Washington , D.C. 20307-5001

If you approve, please pass it on."

:) Irina

Edited to add.. I will look into the information that was provided to me in the comments and will update this post as soon as I find out more. For now please hold on to sending your cards to the address above.. Thank you!

IMPORTANT UPDATE!! I reviewed the information and now I do not think it is a good idea to send cards to the Walter Reed Army Medical Center if we are not sure our cards will reach any of the soldiers. I found this program on AmericanRedCross.org, this one for sure is legit.

Holiday Mail for Heroes

Holiday Mail for Heroes is a partnership between the American Red Cross and Pitney Bowes to deliver one million holiday cards to American service members, veterans and their families in the United States and around the world. Please send cards to this address, following the guidelines listed below:

Holiday Mail for Heroes
PO Box 5456
Capitol Heights, MD 20791-5456

Please follow these simple guidelines when sending your card to ensure it will quickly reach service members, veterans and their families.

- All cards must be postmarked no later than Wednesday, December 10, 2008. Cards sent after this date will be returned to sender.
- If sending more than one card, please mail all cards together in one large shipping envelope. Cards sent in this manner do not need individual envelopes or postage.
- Please ensure that all cards are signed.
- Please use generic salutations such as “Dear Service Member.”
- Please do not include personal information, like email or home addresses.
- Please do not send letters.
- Please do not include inserts of any kind, including photos, glitter, confetti, gift cards or calling cards. Any items inserted into cards will be removed during the reviewing process.
- All cards received may be used in program publicity efforts, including appearing in broadcast, print or online mediums.

:) Irina
Thursday, November 27, 2008

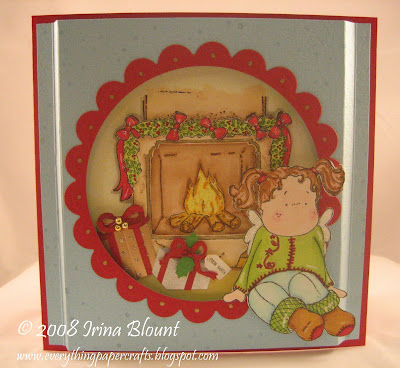
Waiting for Santa

Doesn't Tilda look like she is sitting on the chimney waiting for Santa?

This card measures 6" x 6".


I just love this red paper with the decorative cut border around the sides. It is a 12" x 12" paper that I cut in half and adhered it to the green card base. I added gold dots on the border to highlight it. The green printed paper has snowflakes already embossed on it, very cool!!

Snow on the top and the bottom of the chimney was made with Diamond Glaze and glitter. I stamped large snowflake from Magnolia in blue ink on the white background and then added Crystal Stickles on snowflakes. Tilda was stamped, colored and then cut out. There are pop up dots only under her head and the fit, the rest of her body is adhered. This is how I attach Tilda to most of my cards, makes her look more realistic.

All supplies used to make this card including stamps and the paper are available at Cranberry Hill Mercantile. And now you can even purchase Tilda stamps from Cranberry Hill online, just go to www.cranberryhillmercantile.com and click on Tilda Stamps by Magnolia link. You can still call the store at 408-736-9151 if you would rather place your order over the phone.

:) Irina

Wednesday, November 26, 2008

White Christmas

These three cards are for my upcoming (next week!!) card class at Cranberry Hill Mercantile. All of these cards feature Cuttlebug Die Cuts and Cuttlebug Embossing folders.

First two cards measure 5 1/4" x 5 1/4" and the last card measures 4 1/4" x 5 1/2".


On the first card, I cut out the Snowflake from white cardstock as well as from the thin chipboard (I used one of so many coasters that I already have on hand). Snowflake was embossed with Swiss Dots and then adhered to the chipboard shape. On the square behind the snowflake I made a "frame" using the Scor-Pal. White Pearl Dew Drop in the center of the Snowflake.


On the second card, I cut out and embossed the oval with Nestabilites. Embossed image is inside of the oval, I really like how this has turned out. Snowflakes from Lizzie Anne Designs were stamped with Gold Encore ink. The greeting is from Lizzie Anne Designs as well. Stickles in the centers of the stamped snowflakes and on the snow on the image inside of the oval. White Pearl Dew Drops in the corners.


On the third card, I first made the border on the bottom of the card with the Scor-Pal and then embossed the top of the layer with Swiss Dots. The Ornaments was cut out from the white cardstock and one more from the thin chipboard (just like the snowflake on the first card). I embossed the ornament with the Snowflake folder and then adhered to the chipboard. Ribbon on the top of the Ornament and Dew Drops on both sides of the greeting (the greeting is by Penny Black).

This class is scheduled for:

Thursday, December 4th, 4:30 pm to 7:30 pm
Friday, December 5th, 11 am to 2:00 pm

To sign up for the class, please call Cranberry Hill Mercantile at 408-736-9151.


:) Irina

Tuesday, November 25, 2008

Two Different Looks of Holly Berry Poinsettia

I made these two cards today with the Poinsettia stamp by Holly Berry. I just love the layered look of Holly Berry designs, but also wanted to try a "one layer" one.

The first card measures 6" x 6".


I stamped the background stamp from Hero Arts on the base of the card to create the swirls. The white layer was run through the Cuttlebug Textile folder and then distressed with Gold Encore ink. The white layer is mounted onto the Gold Cardstock. Poinsettia was embossed with the Gold Embossing Powder 4 times, once on the green cardstock and three times on the burgundy color one. All the layers of the flower are popped up. I used Diamond Glaze to put Gold Microbeads in the center of the flower. The Greeting is from the Hero Arts clear stamp set.

The second card measures 4 1/4" x 5 1/2".


On this card I embossed the Poinsettia with the Gold Embossing powder on the Esse White Cardstock, it has the texture of the watercolor paper. I then colored the flower with the Pearlascent watercolors. Every time I use these paints I am amazed at how inexpensive they are but yet they look so beautiful with all the shimmer. The greeting is also heat embossed, this greeting is by Penny Black. Stickles on the poinsettia petals and the Dew Drops in the center. I used my Scor-Pal to create the "frame" around the whole layer.

By using different techniques I created two cards that are so different. I like both of them.

Both of these cards are for my upcoming "Holly Berry Poinsettia" card class at Cranberry Hill Mercantile. The class is scheduled for:

Tuesday, December 2nd, 11 am to 3:30 pm
Wednesday, December 3rd, 4:30 pm to 8 pm

To sign up for the class please call Cranberry Hill Mercantile at 408-736-9151.


:) Irina

Sunday, November 23, 2008

Tilda with Presents

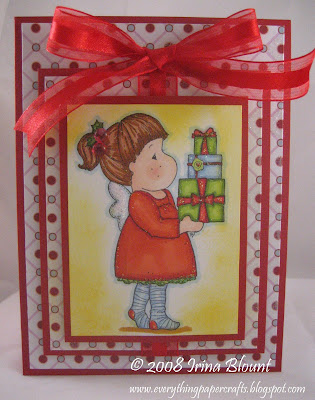
For this card I used Tilda image from the new Christmas Collection. I tried to make the layers on the card to look like a big present with the bow on the top of it. Does it look like it? What do you think?

This card measures 4 1/2" x 6".


I really like this paper from Best Creation, Inc. The paper has a lot of glitter on it. So pretty and sparkly!!

I stamped Tilda with Tuxedo Black Memento Ink and then colored with Copic Markers. Sponged yellow ink around the image. Dew Drops on her hair tie. And, tons of Stickles everywhere for the sparkle.

Both of the layers on the card, the "present" layer and the main layer with Tilda, are raised on pop-up dots.

I am sure I will be using this Tilda image throughout the year for Birthday cards.

All the supplies used to create this card are available for purchase at Cranberry Hill Mercantile. Just give the store a call at 408-736-9151 to place your order if you don't live in the area.

:) Irina

Saturday, November 22, 2008

Tunnel Fold Christmas

This is the second card for my upcoming "Tri-Fold Christmas" card class at Cranberry Hill Mercantile. To view the first card please scroll down to the post below or click here.

This is the "Tunnel style" card. The front of the card looks pretty simple, but there is a hidden surprise inside of the card.. I really like how this card has turned out.

This card measures 4 1/4" x 5 1/2".


The opening for the "tunnel" was created with Nestabilites. All the stamps used on this card are from the Inkadinkado clear stamp set called "Cool Christmas".

This class is scheduled for:

Wednesday, November 26th, 11 am to 2:30 pm
Sunday, November 30th, 11:30 am to 3:00 pm

To sign up for the class please call Cranberry Hill Mercantile at 408-736-9151.

:) Irina

Friday, November 21, 2008

Merry Christmas Reindeer

Have you seen the step cards on Splitcoast lately? I just love the design of those cards, but wanted to come up with the simpler version of the card that I could teach in my classes. So, here is my take on it.. What do you think?

When folded, this card measures 4 1/4" x 5 1/2".


Now looking at the photos of this card, I can tell you that this one definitely looks so much better in real life.

I first stamped the Christmas Trees on the bottom of the main layer. This is the stamp from Magnolia. I stamped the trees three times, on the left side, on the right side and then made a second generation (stamped again without re-inking) image in the center. I made a mask for the moon by punching the circle with the Pink Marvy Punch. Sponged Blue Sky Memento ink all over the layer. Then with the mask still in place stamped snowflakes from Lizzie Anne Designs. Removed the mask and stamped the Reindeer with red ink.

Stickles on the snowflakes, the snow and the greeting.

The Reindeer and the Greeting on the card are from the same clear stamp set by Inkadinkado.

This class is scheduled for:

Wednesday, November 26th, 11 am to 2:30 pm
Sunday, November 30th, 11:30 am to 3:00 pm

To sign up for the class please call Cranberry Hill Mercantile at 408-736-9151.


:) Irina

Wednesday, November 19, 2008

"Diamond Fold" Christmas Card

OK, so here is the second card for my "Different Folds" card class at Cranberry Hill Mercantile. This style of the card is called "Diamond Fold" and the instructions can be found on Scor-Pal website, here is the link. To view the first card for this class please click here.

This card measures 4" x 4" when closed and 4" x 12" when opened (if you stretch it all the way out).


This adorable stamp is by Whipper Snapper and is called "A Hug for Ike". I stamped the image with Tuxedo Black Memento ink and colored with Copic Markers. The snowflakes around the image are the stamp by Lizzie Anne Designs. I put Crystal Stickles in the center of the stamped snowflakes and on the snow.

There are Cuttlebug Snowflakes with the Dew Drops in the centers on both borders of the card.

This class is scheduled for:

Sunday, November 23rd, 11:30 am to 3 pm
Tuesday, November 25th, 11 am to 2:30 pm

To sign up for the class, please call
Cranberry Hill Mercantile at 408-736-9151.


:) Irina

Tuesday, November 18, 2008

Christmas Santa "Spring" Card

Today was the first day in almost three weeks that I did not have a class or wasn't at the stamp show. And, what do you think I was doing? Well, besides taking about three naps I made two cards for one of my classes. I am so behind on everything.. and just trying to catch up.

For my "Different Folds" card class at Cranberry Hill Mercantile I decided to make two different "spring" style cards. I will show you the first card today and the second one tomorrow. The tutorial for this type of card can be found on Scor-Pal website, here is the link.

I made my card larger to accommodate the stamp that I really wanted to use. I started with 6" x 12" cardstock instead of 5" x 10" as per instructions and scored at 3" and 6". Because the top of the card has so many layers and became kind of heavy, I glued the lower triangle of the fold to the base to make the card more stable.

This card was so easy to make and I just love how it turned out!!


I tried to achieve a vintage look with my card. I just LOVE this Santa stamp from Magenta, I think it is so GORGEOUS!! I stamped the image with brown ink on the ivory color cardstock. Stippled red ink on on the edges and then inked the sides with Copper Encore ink. I colored the poinsettias in the corners of the image with Prisma pencils. The main panel is raised on pop up dots.

Paper is from Cosmo Cricket and the corners are from Cuttlebug.

This class is scheduled for:

Sunday, November 23rd, 11:30 am to 3 pm
Tuesday, November 25th, 11 am to 2:30 pm

To sign up for the class, please call Cranberry Hill Mercantile at 408-736-9151.


--------------------------------------------------------

I don't usually post much of the stuff other then crafts on my blog, but I just have to let you see what I got emailed from my friend this morning. This is by far the most hilarious cat video that I've ever seen. Thank you Marcia for making my smile.


:) Irina

Sunday, November 16, 2008

Tilda with Christmas Tree

This is the last card for my "One Layer Tilda Cards" class at Cranberry Hill Mercantile . To view the other cards please click here and here.

This card measures 4 1/4" x 5 1/2".


All three images on the front of the card (Tilda, Christmas Tree and the present under the tree) are from Magnolia. This Tilda image and the Christmas Tree are from the new Winter release and are available at Cranberry Hill Mercantile . You can call the store at 408-736-9151 to place your order.

I stamped Tilda and the present first, masked the images and then stamped the Christmas Tree. Images were colored with Copic Markers and then I sponged blue ink in the center. I used Patina color stickles on the Christmas Tree and Crystal stickles on Tilda and the present. Red Dew Drops for the Christmas Ornaments. Easy!!

This class is scheduled for:

Thursday, November 20th, 11 am to 2:30 pm
Thursday, November 20th, 5 pm to 8 pm

To sign up for the class please call
Cranberry Hill Mercantile at 408-736-9151.

:) Irina

Saturday, November 15, 2008

Dear Santa, Define Good

This is a pretty simple card, but I just love this Santa image and wanted to keep the card simple to have the image stand out.

This is the second card for my "Whipper Snapper Santa" card class at Cranberry Hill Mercantile. To see the first card, please click here.

This card measures 4 1/4" x 5 1/2".


Santa was stamped with Memento ink twice and colored with Copic Markers. Santa's head, hands, shoes and the list are popped up on dimensionals. There is Diamond Glaze on his shoes, and gold brads for the buttons. I sponged with yellow ink around the image.

Corners were punched out and I added gold dots with Gold Zig Painty.

Both stamps on this card, the Santa image and the greeting are from Whipper Snapper.

This class is scheduled for:

Friday, November 28th, 11 am to 2:30 pm
Saturday, November 29th, 11 am to 2:30 pm

To sign up for the class, please call Cranberry Hill Mercantile at 408-736-9151.

:) Irina

Friday, November 14, 2008

Wishing you the best Christmas ever!!

OK, I will be the first one to tell you.. I have to admit that I "failed" in my attempt to make another one layer Tilda card. Well, technically, Tilda is not layered, but there are layers of the paper on this card. You tell me, what do you think?

This is the second card for my "One Layer Tilda" card class at Cranberry Hill Mercantile. To see the first card please click here.

I took so many photos of this card because I wanted you to see all the details.


Tilda was stamped with Memento Black Tuxedo ink and colored with Copic Markers. I stamped additional image on the computer paper and cut her out to create the mask. I masked Tilda and stamped the window behind her (this stamp is also from Magnolia). I then cut out the panels of the window. Behind the window, there is a layer of white vellum with velvet snowflakes from Making Memories. I placed a layer of the blue cardstock behind the vellum to make white snowflakes stand out.

The awning was created by using the Fiskars border punch. With the White Gel pen I drew dots around the bottom of the scalloped edge. The awning is raised up on the pop up dots.

The greeting on the front of the card as well as the pine brunches in the window are from the clear stamp set by Inkadinkado. I thought this greeting was just PERFECT for this card with Tilda.

Inside of the card I stamped the Candy Cane image (from Magnolia), colored with Copic Markers and put some Stickles on it.

On the back of the card I stamped the postage image, also from Magnolia. I stamped it first with green ink and then stamped over with red ink. I really like the effect.

On the envelope I used a different postage stamp image and stamped it in both red and green color.

This class is scheduled for:

Thursday, November 20th, 11 am to 2:30 pm

Thursday, November 20th, 5 pm to 8 pm

To sign up for the class please call Cranberry Hill Mercantile at 408-736-9151.

:) Irina

Thursday, November 13, 2008

Believe in the Magic of the Season

I got back from Carson Monday night and got back to teaching classes on Tuesday. Busy-busy-busy :-). I will tell you more about the Carson show and will post some photos in a few days.

Today I wanted to show you one of the cards for my upcoming "Whipper Snapper Santa" card class at Cranberry Hill Mercantile. I will show you the other card for this class tomorrow.

This card measures 5 1/4" x 5 1/4".


I love-love-love this Santa stamp from Whipper Snapper, isn't he just too cute?!! I stamped the image with Tuxedo Black Memento ink and colored with Copic Markers. Stamped snowflakes with Blue Sky Memento around Santa image. I stamped the same snowflakes with White Pigment ink on the red cardstock.

Added Crystal Effects to Santa's belt and his shoes. For the snow on the chimney and under Santa's feet, I put on some Crystal Effect and then sprinkled on some glitter. This way there is dimension and also the sparkle on the card. There are Stickles on the snowflakes around Santa.

Both ovals for the greeting were punched out with Marvy punches, blue for the oval and the pink one for the scalloped oval.

The greeting and the snowflakes stamps are by Lizzie Anne Designs.

This class is scheduled for:

Friday, November 28th, 11 am to 2:30 pm
Saturday, November 29th, 11 am to 2:30 pm

To sign up for the class, please call Cranberry Hill Mercantile at 408-736-9151.


:) Irina

Thursday, November 6, 2008

New Tilda stamps and the Carson Show

This is the second post for today, please scroll down for the previous one (the one with the cards).

I am going with Stamp On Over to the Original Rubber Stamp Convention in Carson, CA. We are leaving early (very early) on Friday morning. It will be about eight hours drive and then when we get there, we will be setting up for the show on Saturday. The show in Carson is a two-day show, both Saturday and Sunday. It will be a very busy but fun weekend. I don't think I will have the Internet access there and therefore will be "absent" from my blog for a few days.

At the show, I will be doing the same make-and-take as I did at the show in San Jose (click here to check it out). I will also be doing a mini-lecture/presentation on Copic Markers and using Nestabilites with Cuttlebug.

We are going to have over 150 different Tilda, Edwin and accessories stamps and even stamps from the new Winter and Christmas collections at our booth. Have you seen those yet? CUTE!! We are bringing other things with us as well such as Cuttlebug folders and die-cuts, Nestabilites, Memento Inks, Copic Markers, Dew Drops and more!!

If you are coming to the show, please stop by the Stamp on Over booth to say hi.

:) Irina

Two more simple Christmas cards

As promised, here are the rest of the cards for my "Quick and Easy Christmas cards" class. These two cards feature stamps from The Cat's Pajamas.

First card measures 4 1/4" x 5 1/2". There are two poinsettia stamps in this stamp set. I stamped the larger flower twice, once with green ink for the leafs and one more with the red ink. The flowers were cut out and layered with pop up dots. I put three red Dew Drops in the center. The square on the gold cardstock behind the poinsettia was embossed with Nestabilites. The greeting is from the same stamp set and it was stamped with red ink.


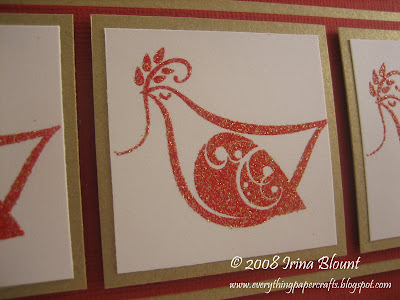
The second card measures 3 3/4" x 9" and it fits in the regular business style envelope. I embossed the dove with red embossing powder. I really like this one for Christmas, it has some sparkle in it. All three squares with the doves are raised on the pop up dots as well as the layer behind them. Green corners were punched out with the corner punch and I dotted on them with the Gold Zig painty. Inside of the card, I stamped the same dove image and the greeting is from the same stamp set.


This class is scheduled for:

Friday, November 14th, 11 am to 2:30 pm
Monday, November 17th, 2 pm to 5:30 pm

To sign up for the class please call Cranberry Hill Mercantile at 408-736-9151.


:) Irina

Wednesday, November 5, 2008

Wishing you Peace

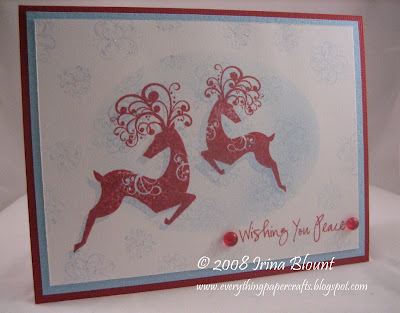
Here is another card for my "Quick and Easy Christmas Cards" class at Cranberry Hill Mercantile. There will be five cards total in this class. To see the first two, please scroll down to the post below or click here. I will show you the other two cards tomorrow.

This card measures 4 1/4" x 5 1/2".


I used oval Nestabilites to create the mask and sponged blue ink inside of the oval. Stamped snowflakes all over the layer. I stamped the reindeer in red ink first and then stamped again in blue ink to create a shadow effect. Stickles on the snowflakes and the Dew Drops by the greeting.
All stamps used on this card are from The Cat's Pajamas clear stamp set.

This class is scheduled for:

Friday, November 14th, 11 am to 2:30 pm
Monday, November 17th, 2 pm to 5:30 pm

To sign up for the class please call Cranberry Hill Mercantile at 408-736-9151.


:) Irina

Tuesday, November 4, 2008

Are you dreaming of a White (and Gold) Christmas?

I LOVE white and gold color combination for Christmas cards, I think you just can't go wrong with that.

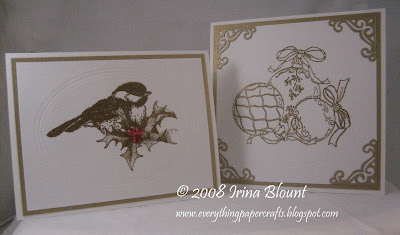
I made two of these cards for my upcoming "Quick and Easy Christmas Cards" class at Cranberry Hill Mercantile. We will make five cards in this class (all different designs). I will show you the other cards within a few days.


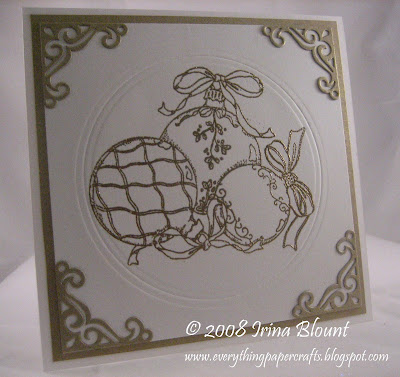
As the name of the class tells you, I was trying to come up with the cards that are simple and quick to make. These cards do not have too many layers and I let the images stand out by heat embossing them with gold embossing powder. I embossed the oval (on the bird card) and the circle (on the ornaments card) with Nestabilites. Added red Dew Drops to the berries on the bird card. The corners on the ornaments card were cut with Cuttlebug.

Card with the bird measures 4 1/4" x 5 1/2". The card with the ornaments measures 5 1/4" x 5 1/4". Both of the stamps are from the Impression Obsession.

This class is scheduled for:

Friday, November 14th, 11 am to 2:30 pm
Monday, November 17th, 2 pm to 5:30 pm

To sign up for the class please call Cranberry Hill Mercantile at 408-736-9151.


:) Irina

Monday, November 3, 2008

"Happy Thanksgiving"

Here is one more card for my upcoming "Be Thankful" card class at Cranberry Hill Mercantile. To see the other cards for this class please click here and here.

This card measures 4 1/4" x 5".


I used the same stamp set by Inkadinkado on this card as well.

Both ovals, plain and scalloped were cut and embossed with Nestabilites. I left the plain oval on the paper as a stencil and sponged orange ink inside of the oval. The greeting was stamped with red ink.

The green border was stamped with the part of the other stamp in the set in green ink. I used the same image to stamp on the right side of the card as well as on the inside layer.

I crumbled the green paper for the distressed look and sponged some green ink on it. The right side of the border is torn. Twine was sponged with some brown ink before I tied it onto the border.

This class is scheduled for:

Tuesday, November 11th, 11 am to 2:30 pm
Wednesday, November 12th, 11 am to 2:30 pm

To sign up for the class, please call Cranberry Hill Mercantile at 408-736-9151.


:) Irina